How to Flush Brake Fluid
The hydraulic fluid in the braking system plays a pivotal role in how well you can slow down and stop your car. Over time, brake fluid absorbs moisture from the air, and it doesn’t work as well as it should. As the fluid degrades, it can lead to corrosion in your brake system and lower the boiling point, which directly affects braking performance.
Neglecting brake fluid maintenance can cause soft or spongy brakes, longer stopping distances, and, in extreme cases, brake failure, especially during hard stops or emergency situations. Regularly flushing your brake fluid not only ensures the best braking performance but also helps keep you safe on the road.
Why Does Brake Fluid Wear Out?
Brake fluid, a hydraulic fluid, by its chemical design is hygroscopic, which means it absorbs water at a rapid rate. This presents problems in any brake system as the master cylinder, lines, proportioning valves, ABS system, and calipers are all composed of parts made from aluminum or steel, metals that corrode in water! Brake fluid is arguably the most ignored fluid change on your car, with some cars going all the way to brake component failure until the component is changed and fluid is flushed. Don’t let it get that far!
Any time the brake system is exposed to any air (usually from the master cylinder reservoir), the fluid absorbs moisture, and as it does so, it’s color turns from clear to a rusty brown over the course of thousands of miles, as corrosion begins inside the brake system. The more water in the fluid, the lower the brake fluid boiling point becomes (think of how hot brakes operate) and the more corrosive the fluid gets. Corrosive brake fluid is the #1 reason why calipers and wheel cylinders begin to seize, as corrosion inside the bores of the cylinder occurs from the contaminated fluid.
What’s a Brake Fluid Flush?
Here enters the brake fluid flush. A car owner who can proactively flush their brake fluid every time a set of pads or shoes is/are installed on their car (usually every 35-60K miles) reduces the risk of brake fade and future caliper or wheel cylinder failure, and they will get overall better brake performance.
Performing a brake fluid flush is an easy task, like changing oil. Before anything, be sure to always make sure to read who to properly bleed the brake system by doing a 2-person brake bleed. If you are unsure, you can always take your car to your preferred mechanic and ask for the fluid to be flushed.
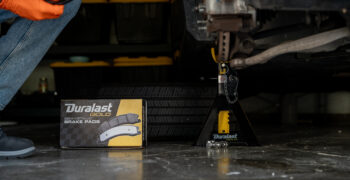
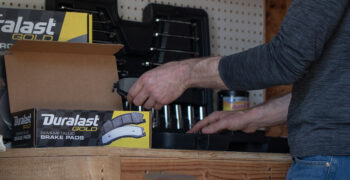
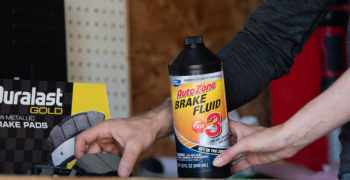
If you are familiar with how to bleed brakes, you will be performing this process the same way as when you change a caliper, brake line, or wheel cylinder. This process is best done by a simple 2-person brake bleed – one person operating the pedal and holding, while the other opens the bleeder screw for less than 2 seconds. You will also need a quart of your favorite brand, and type of brake fluid (remember to check whether the car takes DOT 3 or DOT 4 fluid).
Choosing the Right Brake Fluid for Your Car
DOT 3 and DOT 4 brake fluids are both glycol-based fluids used in hydraulic braking systems, but they have important differences. The key distinction is that DOT 4 absorbs more moisture over time than DOT 3, but it also has a higher boiling point, making it better suited for vehicles that generate more heat in the braking system. This makes DOT 4 ideal for high-performance or heavier vehicles, while DOT 3 is more commonly used in everyday cars with standard braking demands.
| Feature | DOT 3 | DOT 4 |
| Boiling Point (Dry) | 401 F | 446 F |
| Boiling Point (Wet) | 284 F | 311 F |
| Moisture Absorption | Absorbs slower | Absorbs faster |
| Uses | Common in standard vehicles like sedans and light-duty SUVs | Used in high-performance/heavy vehicles like trucks, SUVs, and sports cars |
| Lifespan | Lasts longer before needing a flush | Requires more frequent changes due to moisture absorption |
Signs Your Brake Fluid Needs to be Flushed
When the time comes to flush your brake fluid, your car will tell you if you’re paying attention. Here are some common warning signs that indicate it’s time for a brake fluid flush:
- Spongy or soft brake pedal – If your brake pedal feels spongy or soft when pressed, it may indicate moisture or air has entered the brake fluid, reducing its effectiveness.
- Discolored brake fluid – Fresh brake fluid is usually clear or light yellow. If the fluid in your reservoir looks dark, brown, or murky, it’s a sign that the fluid has degraded and needs to be flushed.
- Poor braking response – If your vehicle takes longer to stop or feels less responsive when braking, contaminated brake fluid may be causing a reduction in brake performance.
- ABS Warning Light – In some cases, a brake fluid issue can trigger the ABS (Anti-lock Braking System) warning light, signaling a problem with your braking system that may require a fluid flush.
- Unusual brake noises – Squealing, grinding, or other abnormal sounds when braking could indicate contaminated brake fluid or other brake system issues that should be addressed.
If you notice any of these symptoms, it’s important to check your brake fluid and flush it if necessary.

Step-by-Step Guide: How to Flush Brake Fluid Safely
This maintenance item isn’t the most complicated to perform, but it must be done correctly so you get all the old fluid out and don’t introduce air into the lines. Here’s a detailed guide on how to perform a brake fluid flush.
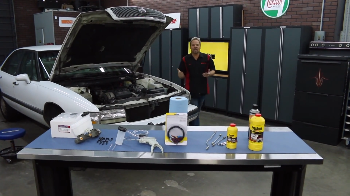
Tools Needed:
- Brake bleeder kit (or helper to pump the brakes)
- Clear tubing
- Large syringe or turkey baster
- Fresh brake fluid
- Wrenches to loosen the bleeder screws
- Safety gloves and protective eyewear
- Catch container
- Rags or paper towels
Remember to always wear gloves and protective eyewear. Brake fluid is corrosive and can damage your skin or eyes. Avoid contact with painted surfaces because brake fluid can strip paint, so be cautious while handling it. Ensure the workspace is well-ventilated to avoid inhaling fumes.
Step-by-Step Instructions
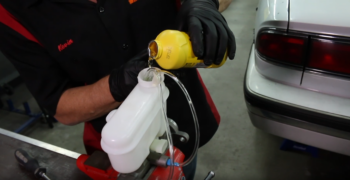
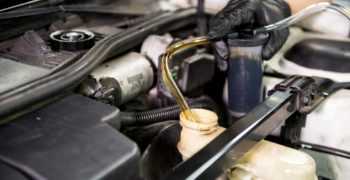
1. Empty the Master Cylinder Reservoir
Use a large syringe, turkey baster, or siphon pump to empty the brake fluid from the master cylinder reservoir. This step prevents old, contaminated fluid from mixing with fresh fluid.
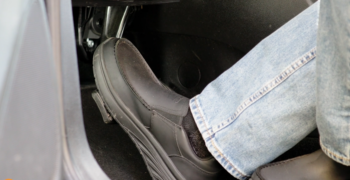
The engine should be off, the car in park, and there should be no pressure on the brake pedal while removing the fluid.
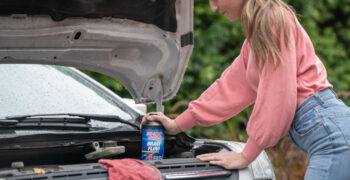
2. Refill the Master Cylinder
After emptying the old fluid, refill the master cylinder with fresh fluid up to the recommended level. Be sure to use the correct type of brake fluid specified by your vehicle’s manual. Throughout the process, you’ll need to periodically check the level and may need to top it up again. It’s incredibly important that it doesn’t run out since air will get into the brake lines and you’ll need to continue bleeding until the air comes out.
Then, move on to the fronts, being sure to re-check the master cylinder reservoir after each wheel is bled.
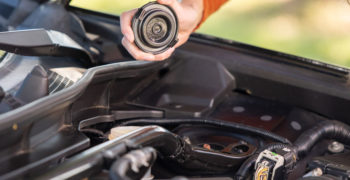
3. Bleed the Brakes
Attach the clear tubing to the bleeder screw located on the rear brake caliper or wheel cylinder. Place the other end of the tube into a container to catch the old brake fluid.
Begin with the brake farthest from the master cylinder, usually the rear passenger side. There are two options: have a helper press the brake pedal while you open the bleeder screw with a wrench, or use a gravity bleeder kit. Fluid will start flowing into the tube. Watch for the old, discolored fluid to be replaced with clean, fresh fluid in the tubing. Once the fluid runs clear, close the bleeder screw and move to the next brake. Repeat this process for the rear driver side, then move to the front brakes.
Tip: Recheck and refill the master cylinder reservoir after each wheel is bled to prevent air from entering the system.
4. Top Off the Master Cylinder
After bleeding all four brakes, refill the master cylinder to the “full” line if necessary. Double-check for leaks and ensure the reservoir cap is secured.
5. Dispose of Used Brake Fluid Properly
Brake fluid is toxic and should never be poured down the drain or thrown in the trash. Take it to a local recycling center or an auto parts store that accepts used fluids for safe disposal.
How Often Should You Change Your Brake Fluid?
That is a great, and often debated question because it’s one of the few fluids that car manufacturers do not normally set a change interval. A good practice though is every 3 years or 30,000 miles.
You can find everything you need to flush your own brake fluid at any of our AutoZone stores. Stop by and talk to an AutoZoner to find all of the parts and tools you need to get the job done right. Or, if you are not the mechanical-type, consider bringing it to one of our Preferred Repair Shops in your area.
FAQs
1. How often should I flush my brake fluid?
Typically, it’s necessary every two to three years, or as recommended by your vehicle’s manufacturer.
2. What type of brake fluid does my car need?
It varies based on your vehicle’s build, but it’s most often DOT 3 or DOT 4.
3. Can I flush my own brake fluid, or should I take it to a mechanic?
You can flush your own brake fluid if you have the right tools and experience, but taking it to a mechanic is safer if you’re unsure.
4. What happens if I don’t change my brake fluid?
It can absorb moisture, leading to corrosion in the braking system and reduced braking performance.
5. How do I know if my brake fluid is bad?
You’ll know your brake fluid is bad if it’s discolored, your brake pedal feels spongy, or your braking performance is less consistent.