How and When To Check Your Oil
Your car's engine is filled with moving parts, and moving parts require adequate lubrication if they're to work properly. Motor oil provides that lubrication, meaning one of the most important things you can do to take care of your car is check your oil levels often. Seeing to it that your oil levels stay at ideal levels will not only help your car run better, but it will extend the life of your engine as well, saving you a small fortune in repair costs over time. Making sure your engine has enough clean oil is the best way to prevent harmful build-up that can affect performance as well. Here's a closer look at what you need to know to properly stay on top of things.
Understanding Different Types of Motor Oil
Different vehicles require different types of engine oil, separated based on their composition:
- Conventional oil is derived from crude oil and contains additives such as detergents and friction modifiers that are intended for less advanced engines.
- Synthetic oils are more highly refined for consistent molecular sizes to protect your engine better, and they contain premium additives that keep your engine cleaner and more efficient.
- High-mileage oils are formulated for vehicles with 75,000 miles or more with seal conditioners, viscosity enhancers, detergents, and anti-wear additives to help extend an engine’s life. There are options in both conventional and synthetic.
The correct engine to use depends on your vehicle and mileage. In your maintenance guide, find the oil type your manufacturer requires. If your car requires synthetic oil, never use a lower grade like conventional oil or you could experience engine issues. If you require conventional oil, you could upgrade to synthetic for better protection if you wish, but it’s not mandatory.
If your engine’s mileage has crossed the 75,000-mile threshold, consider switching to a high-mileage oil instead. It does a better job of keeping the engine clean and preventing seals from leaking while protecting against wear.
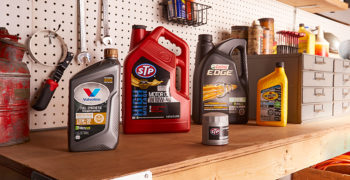
Suggested AutoZone Products

Why Regular Oil Changes and Quality Matter
Oil quality plays a crucial role in both how your engine performs and how long it lasts. High-quality oil provides the right lubrication, reduces friction between engine parts, and prevents wear. It also helps with temperature regulation and removes contaminants that can form sludge.
Using the recommended oil grade ensures the viscosity is correct to coat the parts inside well, allowing the engine to function smoothly under varying conditions. Varying from the correct grade can lead to poor lubrication, increased friction, and potential damage to engine components.
Adhere to regular oil change intervals to avoid damage. As oil ages, it breaks down and loses its protective properties, leading to sludge buildup, reduced lubrication, and overheating. Neglecting oil quality and oil change intervals can result in engine knocking, overheating, reduced fuel efficiency, and potentially catastrophic engine failure.
Visual Aids for Checking Oil and Troubleshooting Common Issues
Most tipsticks a yellow handle or loop for easy identification under the hood like this:

On the dipstick, identify the upper and lower level marks. You want to keep your oil level between these marks, ideally closer at the FULL line.
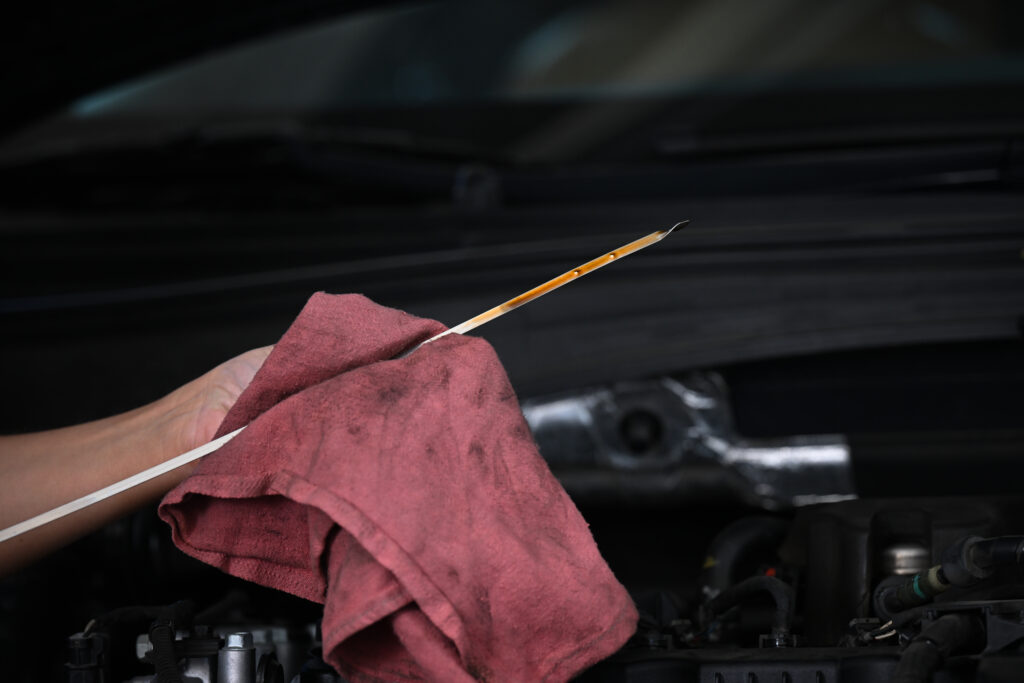
When you read your dipstick, pay close attention to the color of the oil on it.
- If it’s golden or light brown, that’s usually a sign that it’s still in good condition, although it might require a change due to time or mileage.
- If it’s milky or foamy, there may be some water or coolant in the oil and it should be changed immediately. You’ll also need to identify where the water came from, like a potential head gasket leak.
- If the oil is dark black or gritty when you rub it between your fingers, it’s far past due for replacement.
- If there are metallic particles in the oil, it indicates extreme wear in the engine, and it should be diagnosed.
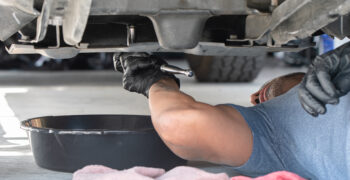
How Do I Check My Oil?
Even if you’ve never done it before, checking your oil is rather easy. Your car’s engine will be equipped with a dipstick that accurately measures the amount of oil in the oil pan.
How to Check Your Oil Level

1. Park Your Car
Always park your car on level ground before checking your oil to ensure an accurate, easy read. Make sure you give your car about 1-2 minutes for the oil to settle back into the pan. While the engine is operating, a portion of the oil inside the oil pan is being circulated throughout the engine. This gives the oil time to settle and drain back into the pan.
2. Check at the Right Temperature
For the most part, it’s recommended that you also check your oil when your engine is cool to avoid dealing with a hot engine. However, some manufacturers recommend checking certain vehicles when the oil and engine are warm instead. Consult your owner’s manual to find out for sure which is best for your vehicle.

3. Make Sure Your Car is Not On
Whether you do a warm or cool check, make sure your engine is off.

4. Pull the Dipstick and Clean It
Locate your engine’s dipstick and pull it out. Gently and thoroughly wipe off any oil with a clean, soft cloth or paper towel.

5. Reinsert the Dipstick
Put the dipstick back into its compartment and push it all the way down. Some dipsticks need to go back in the exact way they came out, so be sure to check this.

6. Remove the Dipstick Again
Pull it out again and make a note of how much of the stick is coated with oil. Although not all dipsticks are identical, every single one will have some clear way of indicating where your oil level currently is versus where it should be (e.g. low and high, L and H, or MIN and MAX).
If your oil levels are within recommended limits, then you’re good to go for now. Just make sure to keep checking back in the future. If your dipstick indicates that your levels are low, you’ll need to add more oil.
If things don’t look right (ie, nothing on the stick or way too much oil) when inspecting the dipstick, double check by re-inserting and removing again. Make sure the dipstick is completely seated in the tube and is put back in the proper way. If your second reading reveals the same thing, you will then need to react by adding oil or removing if over-full.
When you check your oil levels, it’s also important to check the condition of your oil, as it can tell you a lot about how your engine’s been running. Normal, healthy used motor oil is typically either black or brown and free of any visible pieces of debris. If you do see bits of debris in the oil, especially if they look like they might be made of metal, there’s a chance your engine has internal damage, or your oil filter has gone into complete bypass. Alternatively, your oil may appear cloudy, milky, or murky, which can mean you’re dealing with a coolant leak, like a blown head gasket.
In either case, it’s time to get your car to your favorite mechanic shop for further evaluation, or it’s time to dig in for some DIY diagnosing. However, if you do suspect a coolant leak, it’s important not to drive your car. You should have your car towed instead, as it’s better to be safe than sorry.
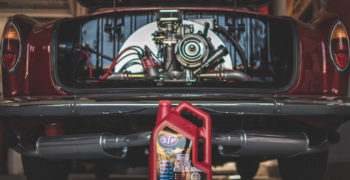
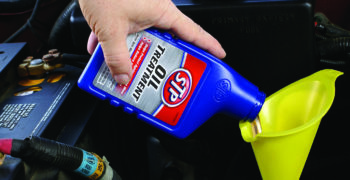
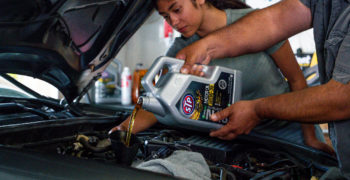
How Do I Add Oil to My Engine?
If you check your engine and levels indicate that you need oil, it’s easy enough to add some. If you don’t know for sure which grade of oil your vehicle requires, consult your owner’s manual to make sure. Most engine oil caps will designate the oil weight the engine requires. You can pick up any weight or type you need at an AutoZone near you. Then top off your oil according to the following directions:
- Remove the cap to your oil tank. (In most cases, it will be located somewhere at the top of your engine.)
- Carefully start adding your oil, preferably using a funnel to keep spills and drips to a minimum. It’s also important not to overfill your tank, as this can cause issues with your engine. Add oil in half quart increments at a time to prevent this.
- After each half quart, give the oil a moment to settle into the tank. Then use your dipstick to retest the levels. Repeat this process until your oil levels are within recommended limits.
- When finished, screw the oil tank cap back into place.
In most cases, a quart is going to be the most you’ll need to add in order to get your oil levels back to where they should be. Every so often though, especially if it’s been awhile since your last check, a second quart could be needed. If you find you need to add extra oil to your engine on a regular basis, you may want to have your vehicle checked to make sure it isn’t either leaking oil or burning it up.
It is vitally important that you do not overfill your engine with oil. An over-filled oil pan will result in the crankshaft striking and sloshing in the oil, which will cause cavitation and air bubbles in the oil. This is equally as bad as an engine running low on oil, so resist the temptation to over-fill an engine that is consistently using or leaking oil.
How Often Should I Check My Oil Levels?
Knowing when to check oil is just as important as knowing how, as consistency is the key to good automotive maintenance. Back in the day, full-service gas stations always checked oil during gas fill up. Today, it’s a great habit to check your oil every 3-4 fill-ups or every 1000 miles. Or, another benchmark would be to get into the habit of checking your vehicle’s oil levels once a month or so. (Checking once every couple of weeks is even better.) If your car is older or has a history of using oil between changes, it’s not a bad idea to check your oil even more often than that. You should also routinely check before taking long drives or going on long road trips of any type just to make sure your oil levels are where they need to be. The last thing you want is to wind up stranded in the middle of nowhere with low oil pressure or engine problems.
Creating a Routine Oil Check Schedule
Knowing when to check oil is just as important as knowing how, as consistency is the key to good automotive maintenance. Back in the day, full-service gas stations always checked oil during gas fill up.
Today, for the average passenger vehicle, it’s a great habit to check your oil every 3 or 4 fill-ups or every 1,000 miles. Get into the habit of checking your vehicle’s oil levels once a month or so if you don’t drive that many miles.
If your car is older or has a history of using oil between changes, it’s not a bad idea to check your oil even more often than that, like every two weeks. You should also routinely check before taking long drives or going on long road trips of any type just to make sure your oil levels are where they need to be. The last thing you want is to wind up stranded in the middle of nowhere with low oil pressure or engine problems.
If you frequently tow or haul heavy loads, your engine oil could break down faster due to heat and friction. Check the oil condition and level every week or 500 miles.
And for anyone driving in extreme temperatures, whether heat or cold, keeping your oil in good condition should be a top priority. Check the oil weekly to ensure you’re keeping the engine lubricated all the time.
Keeping a close eye on the state of your engine is one of the smartest habits you can form when it comes to taking care of your vehicle. Learning to stay in the know with your oil levels is a great place to start. Get started today! If the job is too big for you, seek out one of our Preferred Shops to help you do the job.
FAQs
The oil you should use is specified in your maintenance guide. Never use a grade or quality lower than what’s set out in the guide.
Drain out excess oil to prevent pressure buildup that can cause oil leaks, or add oil to bring it up to at least the minimum level.
Change your oil according to your maintenance guide. It’s often every 5,000 miles or 6 months, or when the oil life monitor indicates it’s due. Don’t rely on the oil level alone as it doesn’t indicate when oil has degraded.
Dark or contaminated oil, low oil on the dipstick, and metallic particles in the oil, and an indicator on the dash are signs the oil needs to be changed.
While there might not be an immediate danger, it’s not a good idea to drive with dirty or low oil as your engine isn’t protected as well as it should be, leading to wear or potential failure.